
What form of data can be uploaded to ScarfWeb?
ScarfWeb takes count matrices as raw data. These count matrices can be generated by preprocessing pipelines like Cellranger, Star-Solo, Alevin-fry or Kallisto-Bustools. The count matrices can contain multiple modalities. Please note that if the count matrices contain normalized or scaled data rather than raw UMI counts, then ScarfWeb may not work as expected.
What are the supported file formats?
Currently, ScarfWeb supports HDF5 format files. These files are usually labelled,
filtered_feature_bc_matrix.h5How many files can I upload at a time?
You may upload as many files as you like as a single batch. ScarfWeb uploads three files concurrently and queues up the rest of the files.
NOTE: Do not navigate away from the page while the upload is in progress. This may cause the uploads to fail.
Where is my data uploaded to?
Your data will be uploaded to the region that’s shown in the top right part of the screen.
Walkthrough: Uploading and Importing Files for Mouse Embryo Project
This walkthrough is designed for self upload of the data. If you are uploading data to be delivered to other users then please refer to this workflow:
- Navigate to the
Uploadpage by clicking on theUploadbutton on the header of the page.
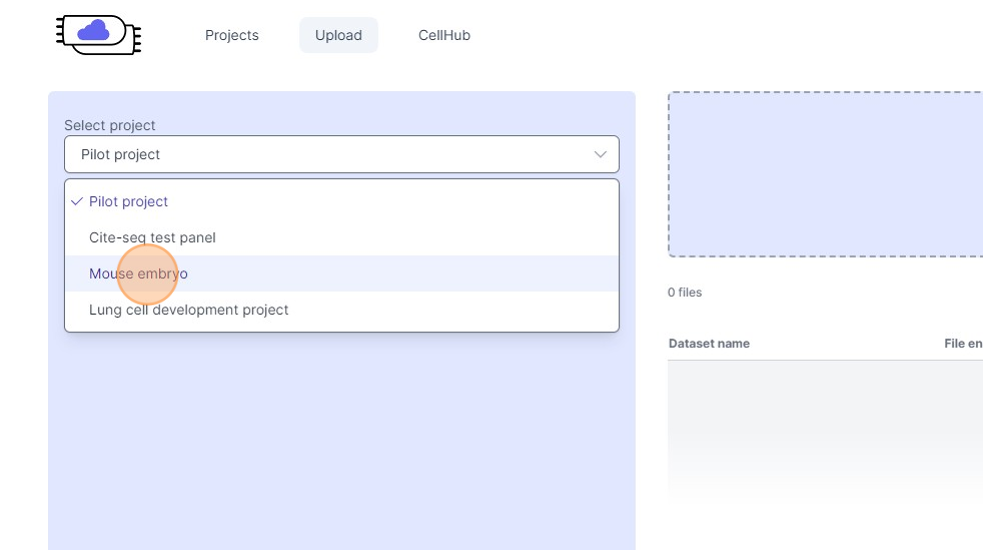
- Select a project to which you would like to upload the data. Please note that you must have created a project before you can upload the data. If you do not have a project yet, then please refer to this guide.
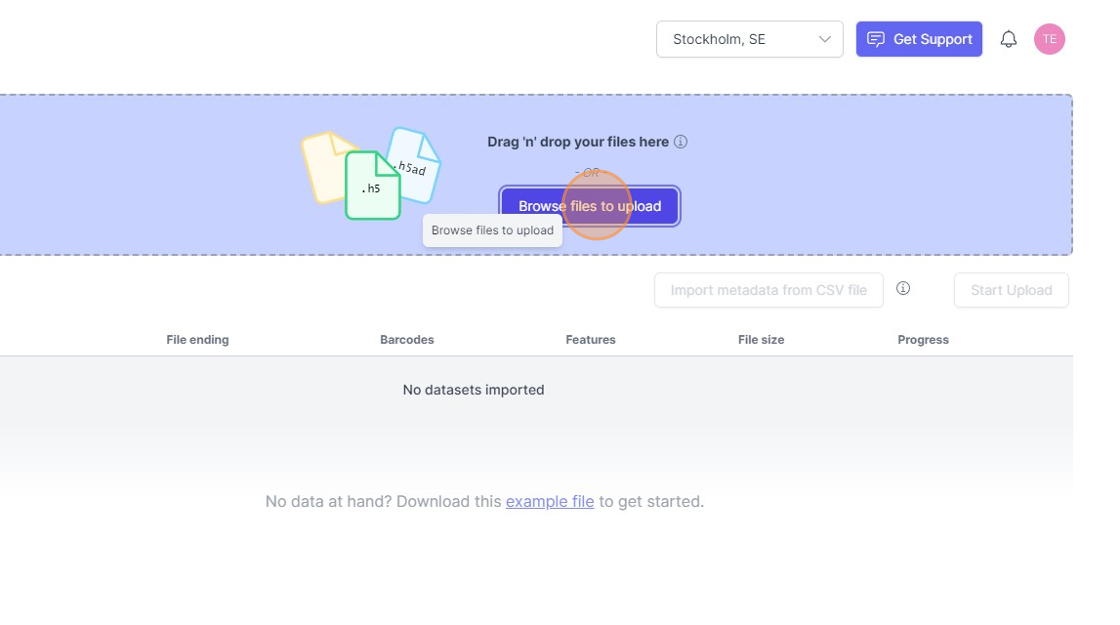
- Click "Browse files to upload" or Drag and drop the files in the blue region.
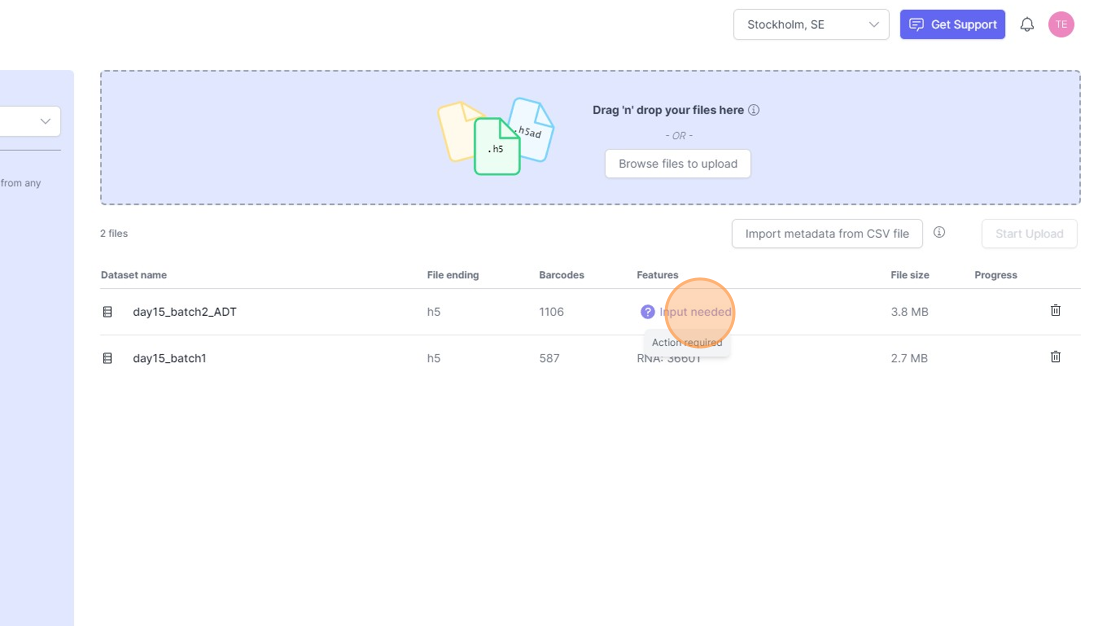
- If your files have multiple assays/modalities, then you will be prompted for Input. Click "Input needed".
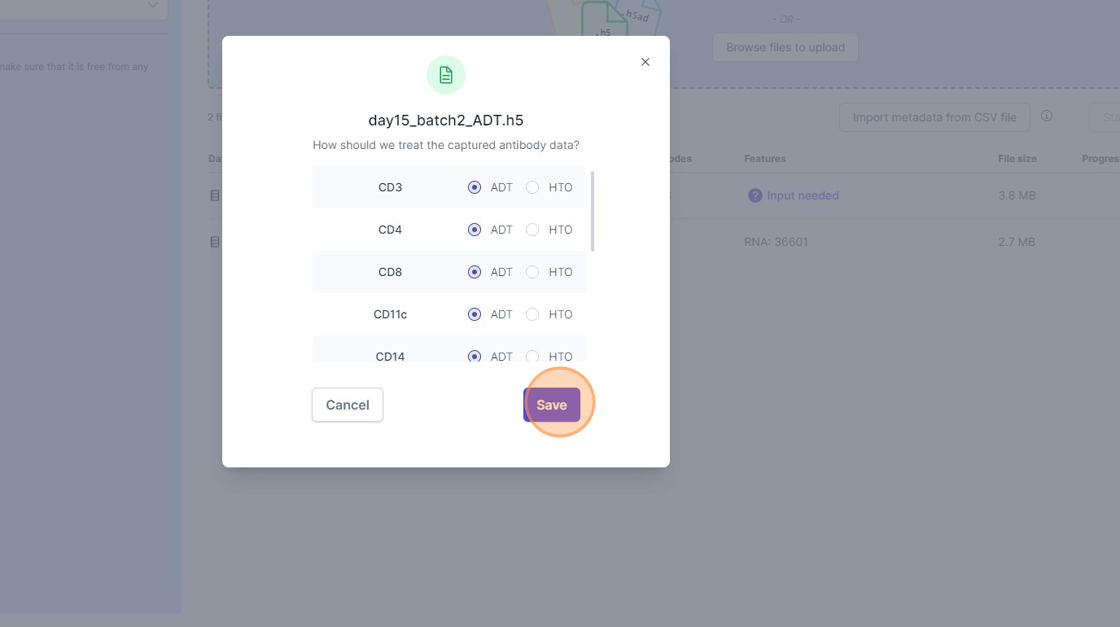
- In this case an “Antibody Capture” modality was identified and the features have to assigned as either ADT (Antibody-derived tags) or HTO (Hashtagged oligo). Click "Save" when done.
- You can still upload more files if you would like. On the Upload screen you can view the number of barcodes and features present per file. Click on “Start Upload“ button to initiate the upload process.

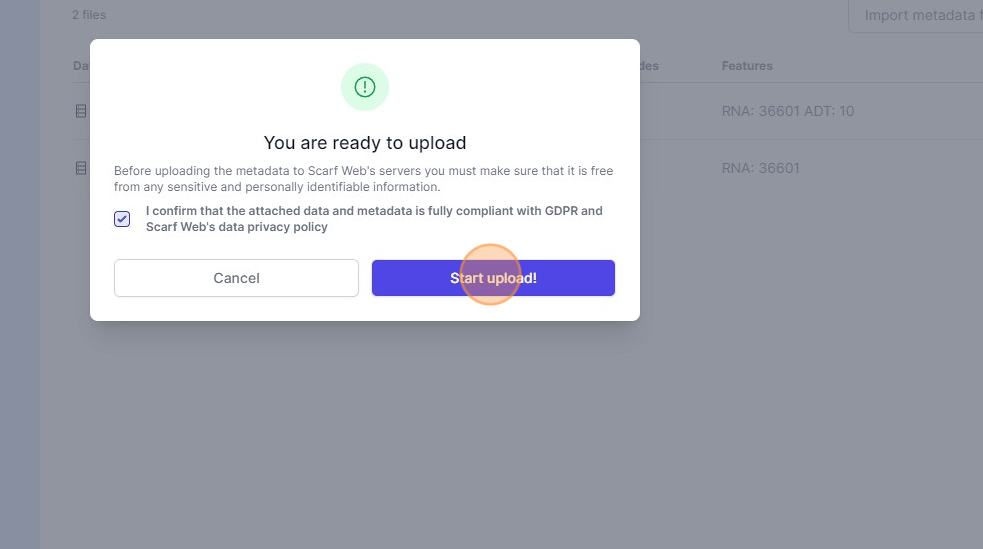
- You will be prompted for confirmation. Please check the button to confirm that you have attached any sensitive metadata on the files. Click “Start Upload”.
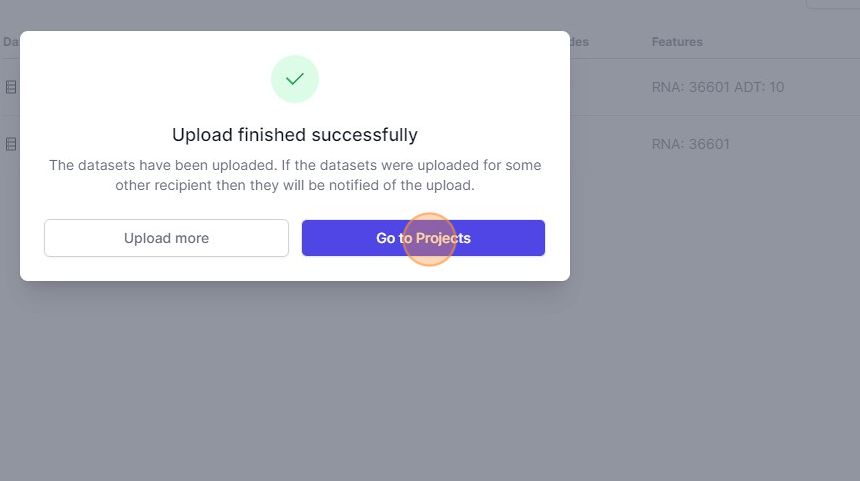
- Once all the files are uploaded, you will be shown a confirmation message. You can click on “Go to Projects” to navigate to the
Projectspage.
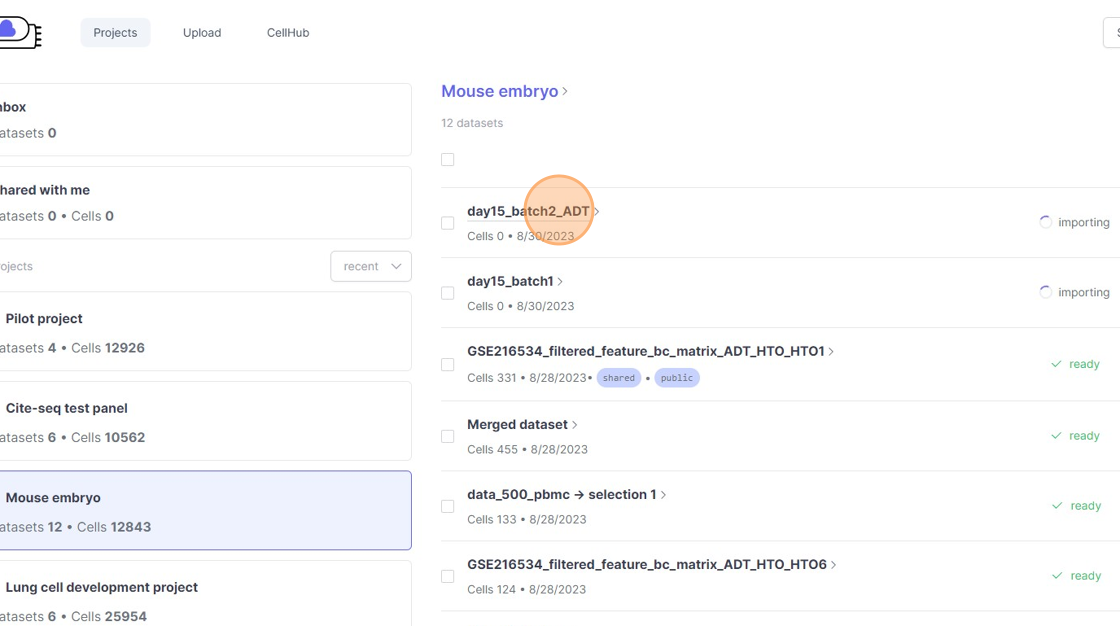
- When you select the project that you selected when uploading the files, you will see your uploaded datasets in the dataset pane. The datasets status will be set to
importing. The duration of the import process will depend upon the size of the file. For example a dataset with 20K cells will be imported under 5 mins while datasets with 200K cells might take up to 20 mins.
This concludes this workflow, please refer to the Analysis guide to learn more about how to initiate analysis of your data.